APPLICABLE TO SHARP - XR-10X-L - XR-10S-L - XG-MB50X-L - XR-11XC-L - XR-HB007X-L
OPTICAL UNIT OUTLINE
Layout for proper setup of the optical components and parts.
OPTICAL UNIT OUTLINE
Layout for proper setup of the optical components and parts.
CLICK ON THE PICTURES TO MAGNIFY
When the DMD unit has been replaced If shading shown in Figure appears on the screen after replacing DMD, turn the adjustment screw of the optical engine to adjust the lighting area of DMD.
Loosen the adjustment lever fixing screw [1] After adjusting the lighting area with the adjustment lever [2] tighten the adjustment lever fixing screw [1].
When mounting DMD, tighten the 4 screws evenly.
Removing the optical mechanism unit and RC light receiver PWB
Remove 4 optical mechanism unit-fixing screws to detach the optical mechanism unit.
Remove the RC light receiver PWB unit.
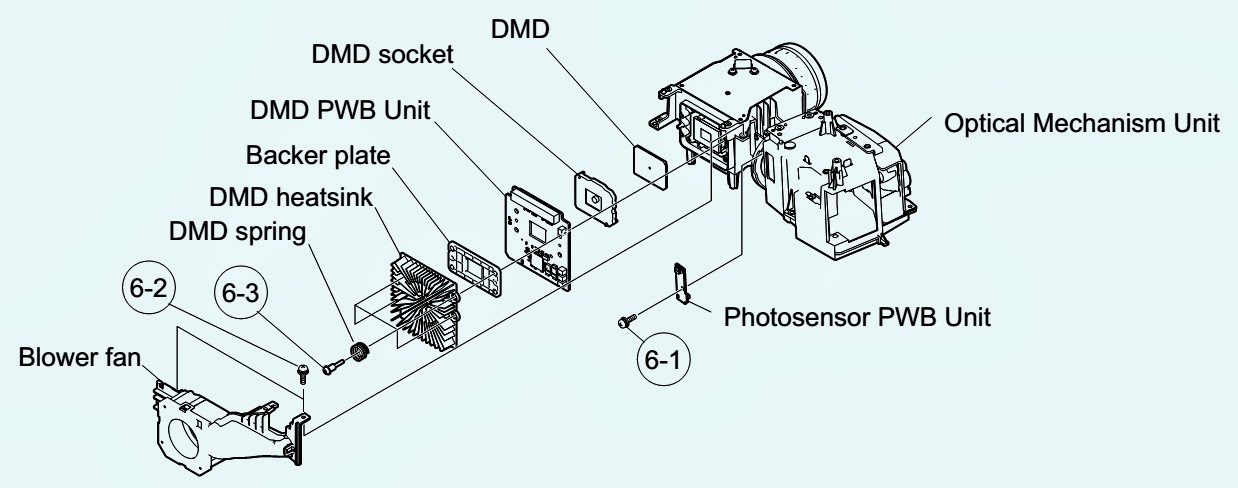
Removing the photo sensor PWB unit, blower fan, DMD PWB, and DMD
Remove 1 photo sensor PWB fixing screw to detach the photo sensor PWB.
Remove 2 blower fan fixing screws to detach the blower fan.
Remove 4 DMD heat sink fixing screws to detach the DMD PWB unit and the DMD.


